Use MTurk
Integrating your JATOS study with MTurk is straightforward, though it requires a bit of clicking.
It's always a good practice to test your setup in the MTurk Sandbox before launching your study to real workers.
What You'll Need
- A requester MTurk account.
- Your study running on a JATOS server.
- A description of the study (this can be the same as the one you used within JATOS).
On JATOS' Side
In JATOS, navigate to your study's page and click on the Study Links button. Then, open the batch you intend to run.
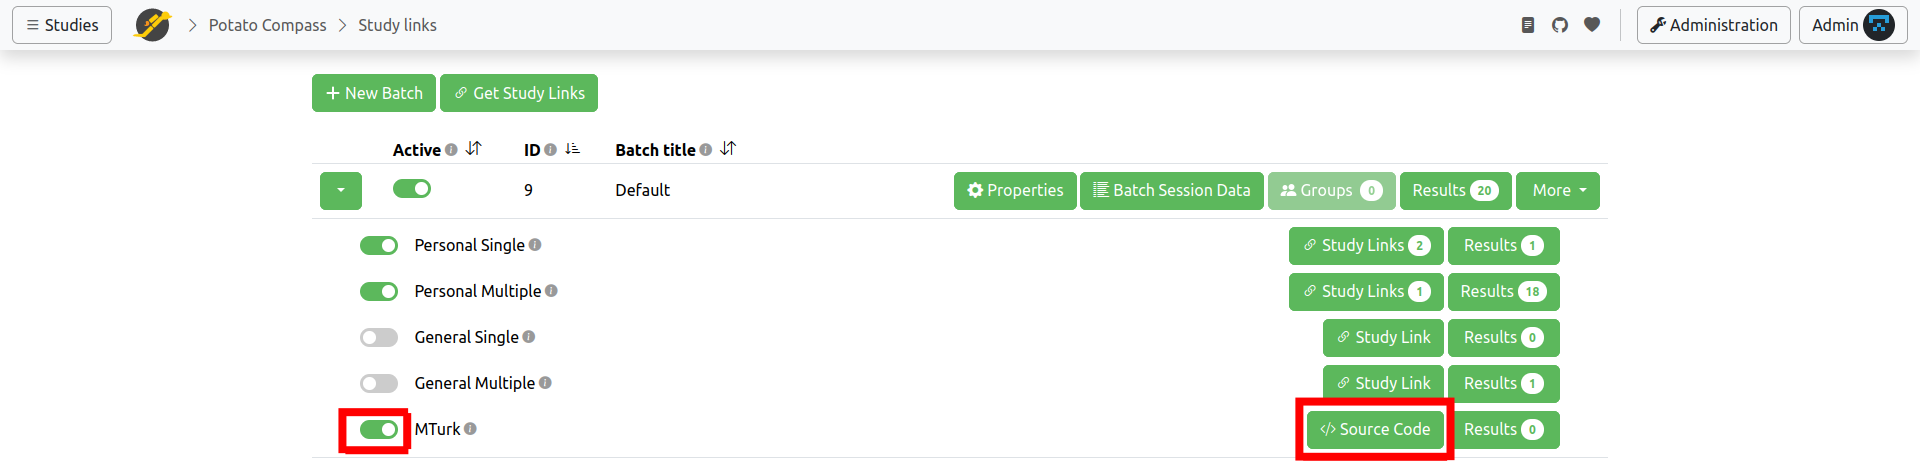
- Remember to enable the MTurk type.
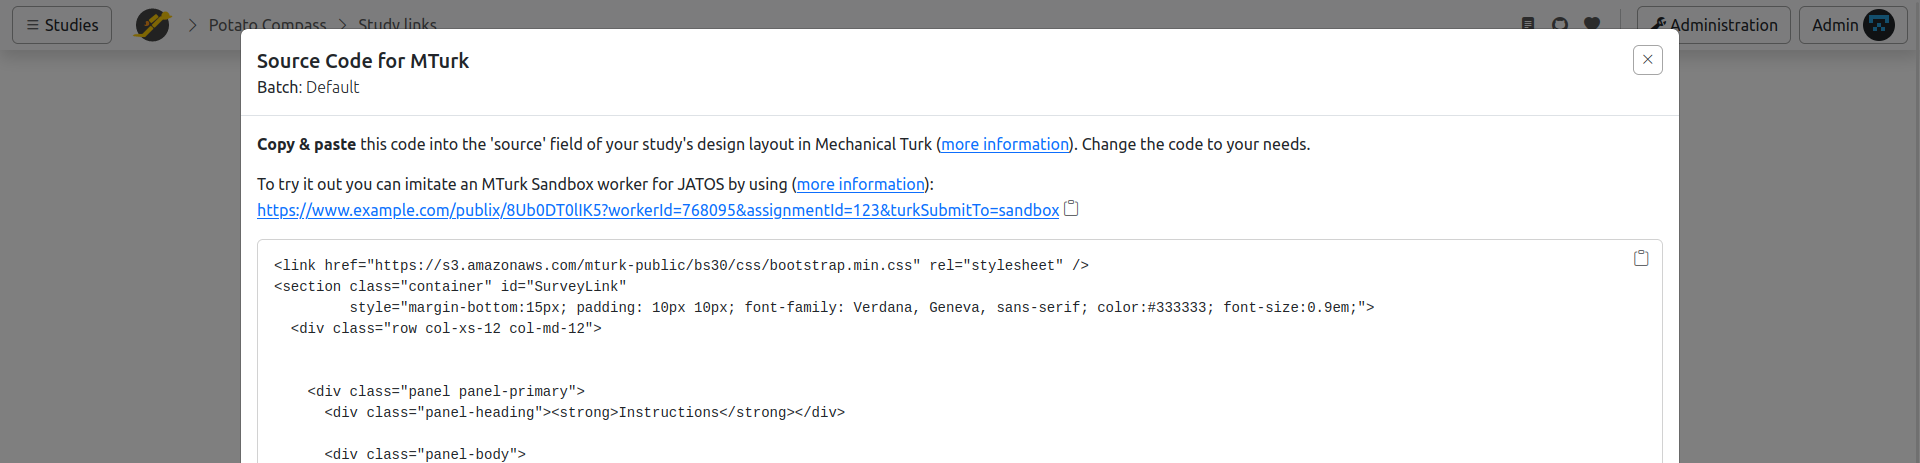
- Click on Source Code. A box will appear displaying HTML code, similar to the one shown here. You will need to copy and paste this code into the MTurk interface.
On MTurk's Page
You'll first need to create a project within the MTurk interface:
Sign into your MTurk requester account (or requester sandbox account).
Navigate to Create ⟶ New Project ⟶ Survey Link ⟶ Create Project. Alternatively, you can directly click this link for requester (or this link for requester sandbox).
Complete the Enter Properties tab.
Click on the Design layout button at the bottom of the page.
Click on the Source button. You'll see some text in an editable window, which corresponds to an HTML file. Delete the entire text in this field.

Now, paste the source code you obtained from JATOS into this text field. This HTML code is ready to use out-of-the-box, so no changes are necessary (though you can modify it if you wish).
To exit the editing mode, click the Source button again and continue setting up your study in MTurk.

What Should Happen
When an MTurk worker finishs a study, they will see a confirmation code like the one shown here.

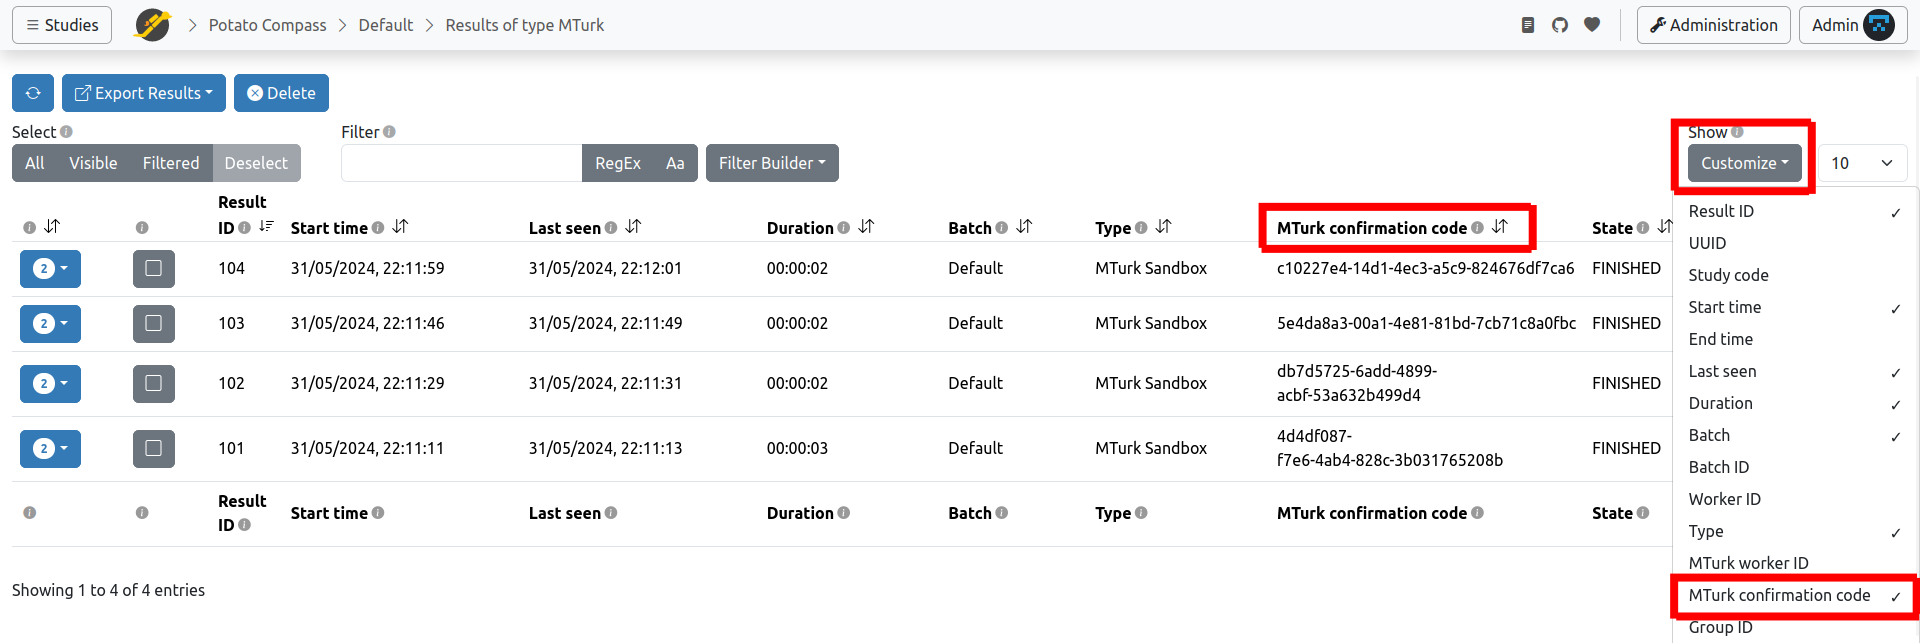
How to Check Confirmation Codes
To assign payment to individual workers, simply compare the confirmation codes stored in JATOS' results page with those recorded in MTurk. To view the confirmation codes in your JATOS results page, you might need to add the column to your table: as shown in the image, go to Customize and select MTurk Confirmation Code.